I wanted to learn how to use Bitlocker encryption. The requirement I had is to enable Bitlocker drive encryption on a virtual machine without a TPM security chip or access to USB devices. Before starting I read the Windows BitLocker Drive Encryption Step-by-Step Guide from Technet and I found following statement:
Using USB removable storage on a virtual machine is not going to work. The only way to get BitLocker working is to change a group policy setting and allow BitLocker to work without a TPM chip and use a floppy disk as storage for the startup key.
Floppy disk is available during the Vista boot process when running the system as virtual machine. I was successfully able to run the BitLocker preparation because of the additional volume requirement on my installed system.
How to enable BitLocker on a virtual machine without TPM?
Install Windows Vista SP1(Enterprise or Ultimate editions) virtual machine
- Make sure the disk has been partitioned with additional volume. Use the SHIFT+F10 to perform these steps in Vista Setup.
create partition primary size=1500
assign letter=S
create partition primary
assign letter=c
If you can’t partition the hard disk then use the BitLocker Drive Preparation Tool.
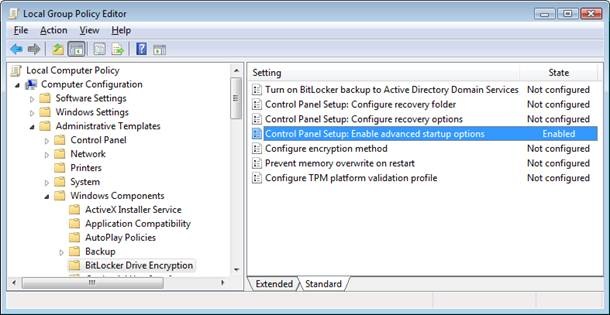
Change the GPO setting.
- Open Gpedit.msc and locate the “Control Panel Setup:Enable advanced startup options” setting in Computer Configuration/Administrative Templates/Windows Components/Bitlocker Drive Encryption and configure “Control Panel Setup: Enable advanced startup options”; check Allow Bitlocker without compatible TPM chip and Reboot.
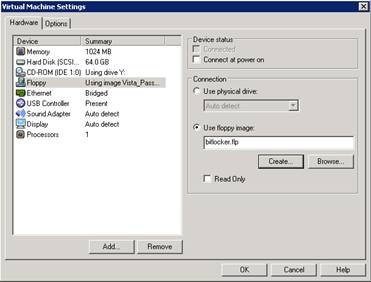
Make sure Floppy drive has been configured for the virtual machine and create new bitlocker.flp file. Format the disk.
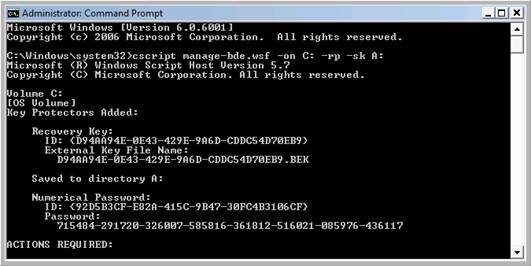
Open a privileged command prompt and run cscript C:\Windows\System32\manage-bde.wsf -on C: -rp -sk A:
Reboot and make sure floppy drive is last option in the bios boot order.
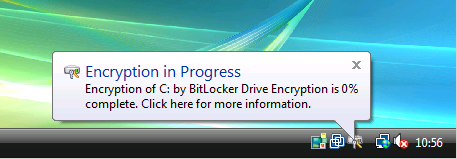
Encryption in Progress has started. Keep in mind that BitLocker will encrypt the complete partition and in my case use 64GB of the virtual hard disk. After the process has been finished I will end with 64GB virtual disk on the system.
Using these steps I am able to test all different features and Bitlocker options available. If you buy new hardware today then the TPM complaint chip will be available.


Chris Towles
I Wrote a method for windows 7 and 2008 R2 to use another diskdrive to store the bitlocker key rather than usb.
How to Encrypt VMware VM running Windows 2008 R2 with Microsoft Bitlocker
http://www.christowles.com/2010/10/how-to-encrypt-vmware-vm-running.html
Ivan Versluis
Dear Chris,
Thanks for stopping by. I have read your article and I like that. At my company we are not using that but something to keep in mind for the future.
Johnetta Woloszczak
check it out